Tuesday, November 11, 2014

Bend it like Bluemix, MongoDB with autoscaling - Part 3

In this last post of this series, I test the performance of Bluemix & MongoDB against  concurrent queries and deletes to the cloud based app with Mongo DB, with auto-scaling on. Before I started these series of tests I moved the Overload policy a couple of notches higher and made it scale out if  memory utilization > 75% for 120 secs and < 30% for 120 secs (from the earlier 55% memory utilization) as shown below.

27
The code for bluemixMongo app can be forked from Devops at bluemixMongo or can be cloned from GitHub at  bluemix-mongo-autoscale. The multi-mechanize scripts can be downloaded from GitHub at multi-mechanize    

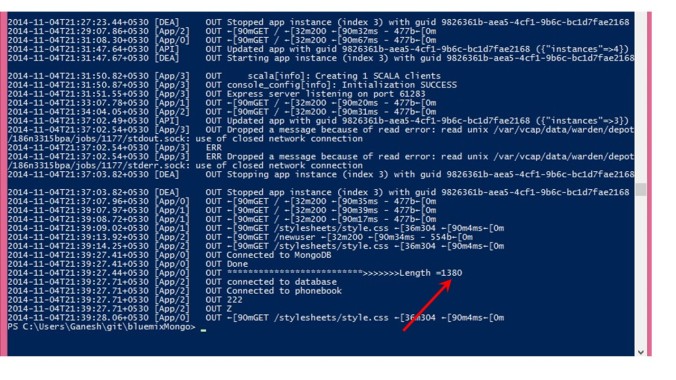
 Before starting the testing I checked the current number of documents inserted by the concurrent inserts (see Bend it like Bluemix., MongoDB using Auto-scaling – Part 2). The total number as determined by checking the logs was 138017 
 Sure enough with the scaling policy change after 2 minutes the number of instanced dropped from 3 to 2
18

1. Querying the bluemixMongo app with Multi-mechanize
The Multi-mechanize Python script used for querying the bluemixMongo app simply invokes the app’s userlist URL (resp=br.open("http://bluemixmongo.mybluemix.net/userlist/")
v_user.py
def run(self):
# create a Browser instance
br = mechanize.Browser()
# don"t bother with robots.txt
br.set_handle_robots(False)
# start the timer
start_timer = time.time()
#print("Display userlist")
# Display 5 random documents
resp=br.open("http://bluemixmongo.mybluemix.net/userlist/")
assert("Example Mongo Page" in resp.get_data())
# stop the timer
latency = time.time() - start_timer
self.custom_timers["Userlist"] = latency
r = random.uniform(1, 2)
time.sleep(r)
self.custom_timers['Example_Timer'] = r

The configuration setup for this script creates 2 sets of 10 concurrent threads
config.cfg
run_time = 300
rampup = 0
results_ts_interval = 10
progress_bar = on
console_logging = off
xml_report = off
[user_group-1]
threads = 10
script = v_user.py
[user_group-2]
threads = 10
script = v_user.py


The corresponding userlist.js for querying the app is shown below. Here the query is constructed by creating a ‘RegularExpression’ with  a random Firstname, consisting of a random letter and a random number. Also the query is also limited to 5 documents.

function(callback)
{
// Display a random set of 5 records based on a regular expression made with random letter, number
var randnum = Math.floor((Math.random() * 10) + 1);
var alpha = ['A','B','C','D','E','F','G','H','I','J','K','L','M','N','O','P','Q','R','S','T','U','V','X','Y','Z'];
var randletter = alpha[Math.floor(Math.random() * alpha.length)];
var val =  randletter + ".*" + randnum + ".*";
// Limit the display to 5 documents
var results = collection.find({"FirstName": new RegExp(val)}).limit(5).toArray(function(err, items){
if(err) {
console.log(err + " Error getting items for display");
}
else {
res.render('userlist',
{ "userlist" : items
}); // end res.render
} //end else
db.close(); // Ensure that the open connection is closed
}); // end toArray function
callback(null, 'two');
}

2. Running the userlist query
The following screenshot shows the userlist query being executed concurrently with Multi-mechanize. Note that the number of  instances also drops down to 1
18

3. Deleting documents with Multi-mechanize
The multi-mechanize script for deleting a document is shown below. This script calls the URL with resp = br.open("http://bluemixmongo.mybluemix.net/remuser"). No values are required to be entered into the form and the ‘submit’ is simulated.
v_user.py
def run(self):
# create a Browser instance
br = mechanize.Browser()
# don"t bother with robots.txt
br.set_handle_robots(False)
br.addheaders = [("User-agent", "Mozilla/5.0Compatible")]
# start the timer
start_timer = time.time()
# submit the request
resp = br.open("http://bluemixmongo.mybluemix.net/remuser")
#resp = br.open("http://localhost:3000/remuser")
resp.read()
# stop the timer
latency = time.time() - start_timer
# store the custom timer
self.custom_timers["Load_Front_Page"] = latency
# think-time
time.sleep(2)
# select first (zero-based) form on page
br.select_form(nr=0)
# set form field
br.form["firstname"] = ""
br.form["lastname"] = ""
br.form["mobile"] = ""
# start the timer
start_timer = time.time()
# submit the form
resp = br.submit()
resp.read()
print("Removed")
# stop the timer
latency = time.time() - start_timer
# store the custom timer
self.custom_timers["Delete"] = latency
# think-time
time.sleep(2)

config.cfg
The config file is set to start 2 sets of 10 concurrent threads and execute for 300 secs
[global]
run_time = 300
rampup = 0
results_ts_interval = 10
progress_bar = on
console_logging = off
xml_report = off
[user_group-1]
threads = 10
script = v_user.py
[user_group-2]
threads = 10
script = v_user.py
;

deleteuser.js
This Node.js script does a findOne() document and does a remove with the ‘justOne’ set to true
collection.findOne(function(err, item) {
// Delete just a single record
collection.remove(item, {justOne:true},(function (err, doc) {
if (err) {
// If it failed, return error
res.send("There was a problem removing the information to the database.");
}
else {
// If it worked redirect to userlist
res.location("userlist");
// And forward to success page
res.redirect("userlist");
}
}));
});
collection.find().toArray(function(err, items) {
console.log("Length =----------------" + items.length);
db.close();
});
callback(null, 'two');

4. Running the deleteuser multimechanize script

The output of the script executing and the reduction of the number of instances because of the change in the memory utilization policy is shown
21

5. Multi-mechanize
As mentioned in the previous posts
The multi-mechanize commands are executed as follows

To create a new project
multimech-newproject.exe userlist
This will create 2 folders a) results b) test_scripts and the file c) config.cfg. The v_user.py needs to be updated as required

To run the script
multimech-run.exe userlist
The details of the response times for the query is shown below .
All_Transactions_response_times_intervals
 

More details on latency and throughput for the queries and the deletes are included in the results folder of multi-mechanize    

6. Autoscaling The details of the auto-scaling service is shown below

a. Scaling Metric Statistics
22

b. Scaling history
23
7. Monitoring and Analytics (M & A) The output from M & A is shown  below
 

a. Performance Monitoring24 

b. Log Analysis output The log analysis give a detailed report on the calls made to the app, the console log output and other useful information
25

The series of the 3 posts Bend it like Bluemix, MongoDB with auto-scaling demonstrated the ability of the cloud to expand and shrink based on the load on the cloud.An important requirement for Cloud Architects is design applications that can  scale horizontally without impacting the performance while keeping the costs optimum. The real challenge to auto-scaling is the need to make the application really distributed as opposed to the monolithic architectures we are generally used to.   I hope to write another post on creating simple distributed application later.

Hasta la Vista!
Also take a look at

Disclaimer: This article represents the author’s viewpoint only and doesn’t necessarily represent IBM’s positions, strategies or opinions
[polldaddy rating="7295683"]

Sunday, November 9, 2014

Bend it like Bluemix, MongoDB using Auto-scaling - Part 2!

This post takes off from my previous post Bend it like Bluemix, MongoDB using Auto-scale -  Part 1! In this post I generate traffic using Multi-Mechanize a performance test framework and check out the auto-scaling on Bluemix, besides also doing some rudimentary check on the latency and throughput for this test application. In this particular post I generate concurrent threads which insert documents into MongoDB.

Note: As mentioned in my earlier post this is more of a prototype and the typical situation when architecting cloud applications. Clearly I have not optimized my cloud app (bluemixMongo) for maximum efficiency. Also this a simple 2 tier application with a rudimentary Web interface and a NoSQL DB at This is more of a Proof of Concept (PoC) for the auto-scaling service on Bluemix.

As earlier mentioned the bluemixMongo app is a modification of my earlier post Spicing up a IBM Bluemix cloud app with MongoDB and NodeExpress. The bluemixMongo cloud app that was used for this auto-scaling test can be forked from Devops at bluemixMongo or from GitHib at bluemix-mongo-autoscale. The Multi-mechanize config file, scripts and results can be found at GitHub in multi-mechanize

The document to be inserted into MongoDB consists of 3 fields – Firstname, Lastname and Mobile. To simulate the insertion of records into MongoDB I created a Multi-Mechanize script that will generate random combination of letters and numbers for the First and Last names and a random 9 digit number for the mobile. The code for this script is shown below

1. The snippet below measure the latency for loading the ‘New User’ page
v_user.py
def run(self):
# create a Browser instance
br = mechanize.Browser()
# don"t bother with robots.txt
br.set_handle_robots(False)
print("Rendering new user")
br.addheaders = [("User-agent", "Mozilla/5.0Compatible")]
# start the timer
start_timer = time.time()
# submit the request
resp = br.open("http://bluemixmongo.mybluemix.net/newuser")
#resp = br.open("http://localhost:3000/newuser")
resp.read()
# stop the timer
latency = time.time() - start_timer
# store the custom timer
self.custom_timers["Load Add User Page"] = latency
# think-time
time.sleep(2)
The script also measures the time taken to submit the form containing the Firstname, Lastname and Mobile
# select first (zero-based) form on page
br.select_form(nr=0)
# Create random Firstname
a = (''.join(random.choice(string.ascii_uppercase) for i in range(5)))
b = (''.join(random.choice(string.digits) for i in range(5)))
firstname = a + b
# Create random Lastname
a = (''.join(random.choice(string.ascii_uppercase) for i in range(5)))
b = (''.join(random.choice(string.digits) for i in range(5)))
lastname = a + b
# Create a random mobile number
mobile = (''.join(random.choice(string.digits) for i in range(9)))
# set form field
br.form["firstname"] = firstname
br.form["lastname"] = lastname
br.form["mobile"] = mobile
# start the timer
start_timer = time.time()
# submit the form
resp = br.submit()
print("Submitted.")
resp.read()
# stop the timer
latency = time.time() - start_timer
# store the custom timer
self.custom_timers["Add User"] = latency

2. The config.cfg file is setup to generate 2 asynchronous thread pools of 10 threads for about 400 seconds
config.cfg
run_time = 400
rampup = 0
results_ts_interval = 10
progress_bar = on
console_logging = off
xml_report = off
[user_group-1]
threads = 10
script = v_user.py
[user_group-2]
threads = 10
script = v_user.py

3. The code to add a new user in the app (adduser.js) uses the ‘async’ Node module to enforce sequential processing.
adduser.js
async.series([
function(callback)
{
collection = db.collection('phonebook', function(error, response) {
if( error ) {
return; // Return immediately
}
else {
console.log("Connected to phonebook");
}
});
callback(null, 'one');
},
function(callback)
// Insert the record into the DB
collection.insert({
"FirstName" : FirstName,
"LastName" : LastName,
"Mobile" : Mobile
}, function (err, doc) {
if (err) {
// If it failed, return error
res.send("There was a problem adding the information to the database.");
}
else {
// If it worked, redirect to userlist - Display users
res.location("userlist");
// And forward to success page
res.redirect("userlist")
}
});
collection.find().toArray(function(err, items) {
console.log("**************************>>>>>>>Length =" + items.length);
db.close(); // Make sure that the open DB connection is close
});
callback(null, 'two');
}
]);

4. To checkout auto-scaling the instance memory was kept at 128 MB. Also the scale-up policy was memory based and based on the memory of the instance exceeding 55% of 128 MB for 120 secs. The scale up based on CPU utilization was to happen when the utilization exceed 80% for 300 secs.

6
 

5. Check the auto-scaling policy
7

6. Initially as seen there is just a single instance
9

7. At around 48% of the script with around 623 transactions the instance is increased by 1. Note that the available memory is decreased by 640 MB – 128 MB = 512 MB.
10

8. At around 1324 transactions another instance is added
Note: Bear in mind
a) The memory threshold was artificially brought down to 55% of 128 MB.b) The app itself is not optimized for maximum efficiency
12
9. The Metric Statistics tab for the Autoscaling service shows this memory breach and the trigger for autoscaling
13
 
10. The Scaling history Tab for the Auto-scaling service displays the scale-up and scale-down and the policy rules based on which the scaling happened
14
 
11. If you go to the results folder for the Multi-mechanize tool the response and throughput are captured.
The multi-mechanize commands are executed as follows

To create a new project
multimech-newproject.exe adduser
This will create 2 folders a) results b) test_scripts and the file c) config.cfg. The v_user.py needs to be updated as required
To run the script
multimech-run.exe adduser

12.The results are shown below
a) Load Add User page (Latency)
Load Add User Page_response_times_intervals
 

b) Load Add User (Throughput)
Load Add User Page_throughput

c)Load Add User (Latency)
Add User_response_times_intervals

d) Load Add User (Throughput)
Add User_throughput
The detailed results can be seen at GitHub at multi-mechanize

13. Check the Monitoring and Analytics Page

a) Availability
16

b) Performance monitoring
15
So once the auto-scaling happens the application can be fine-tuned and for performance. Obviously one could do it the other way around too.

As can be seen adding NoSQL Databases like MongoDB, Redis, Cloudant DB etc. Setting up the auto-scaling policy is also painless as seen above.

Of course the real challenge in cloud applications is to make them distributed and scalable while keeping the applications themselves lean and mean!

See also
Disclaimer: This article represents the author’s viewpoint only and doesn’t necessarily represent IBM’s positions, strategies or opinions

Saturday, November 8, 2014

Bend it like Bluemix, MongoDB using Auto-scale - Part 1!

In the next series of posts I turn on the heat on my cloud deployment in IBM Bluemix and check out the elastic nature of this PaaS offering. Handling traffic load and elastically expanding and contracting is what the cloud does best. This is  where the ‘rubber really meets the road”. In this series of posts I generate the traffic load using Multi –Mechanize a performance test framework created by Corey Goldberg.

This post is based on an earlier cloud app that I created on Bluemix namely Spicing up a IBM Bluemix Cloud app with MongoDB and NodeExpress. I had to make changes to this code to iron out issues while handling concurrent  inserts, displays and deletes issued from the multi-mechanize tool and also to manage the asynchronous nightmare of Nodejs.

The code for this Bluemix, MongoDB with Auto-scaling can be forked  from Devops at bluemixMongo. The code can also be cloned from GitHub at bluemix-mongo-autoscale

1.  To get started, fork the code from Devops at bluemixMongo. Then change the host name in manifest.yml to something unique and click the Build and Deploy button on the top right in the page.
26
1a.  Alternatively the code can be cloned from GitHub at bluemix-mongo-autoscale. From the directory where the code is cloned push the code using Cloud Foundry’s cf command as follows
cf push bluemixMongo –p . –m 128M

2. Now add the MongoDB service and click ‘OK’ to restage the server.
3
3. Add the Monitoring and Analytics (M & A) and also the Auto-scaling service. The M& A gives a good report on the Availability, Performance logging, and also provides Logging Analysis. The Auto-scaling service is the service that allows the app to expand elastically to changing traffic loads.
4
4. You should see the bluemixMongo app running with 3 services MongoDB, Autoscaling and M&A
5
5. You should now be able click the bluemixMongo.mybluemix.net and check the application out.

6.Now you configure the Overload Policy (auto scaling) policy. This is a slightly contrived example and the scaling policy is set to scale up if the Memory exceeds 55%. (Typically the scale up would be configured for > 80% memory usage)
6
7. Now check the configured Auto-scaling policy
7
8. Change the Memory Quota as appropriate. In my case I have kept the memory quota as 128 MB. Note the available memory is 640 MB and hence allows up to 5 instances. (By the way it is also possible to set any other value like 100 MB).
5
9. Click the Monitoring and Analytics service and take a look at the output in the different tabs
8
10. Next you need to set up the Performance test tool – Multi mechanize. Multi-mechanize creates concurrent threads to generate the load on a Web site or service. It is based on Python which  makes it easy to modify the scripts for hitting a website, making a REST call or submitting a form.

To setup Multi-mechanize you also need additional packages like numpy  matplotlib etc as the tool generates traffic based on a user provided script, measures latency and throughput besides also generating graphs for these.
For a detailed steps for setup of Multi mechanize please follow the steps in Trying out multi-mechanize web performance and load testing framework. Note: I would suggest that you install Python 2.7.2 and not the later 3.x version as some of the packages are based on the 2.7 version which has a slightly different syntax for certain Python statements

In the next post I will run a traffic test on the bluemixMongo application using Multi-mechanize and observe how the cloud app responds to the load.
Watch this space!

You may like :
Disclaimer: This article represents the author’s viewpoint only and doesn’t necessarily represent IBM’s positions, strategies or opinions

Monday, October 27, 2014

Where is the Cloud Computing bus going?

delorean_19813Technological innovation patterns have often repeated themselves in history. So it is with Cloud Computing. Familiar patterns of change seem to emerge today
Here are some of main trends that I see in Cloud Computing
Advent of containers: Containers are the new hot topic in cloud computing. In virtualization guest OS’es run separately. Running separate guest OS over the hypervisor is associated with a lot of overhead for each of the heavy weight OS’es. Containers can be used as an alternative to OS-level virtualization to run multiple isolated systems on a single host. Containers within a single operating system are much more efficient being light weight while being able to provide the same level of isolation. Containers run the same kernel as the host. Here is an interesting article on containers Containers, not virtual machines are the future of the cloud.
In many ways this containers over VM innovation pattern is reminiscent of the advantages of lightweight ‘threads’ over the heavy and slow ‘process’ approach in the OS world.  It is inevitable that containers will eventually score over VMs
Open ‘something’ over proprietary’ness: Technology over the decades has always moved into an ‘open’ approach over proprietary solutions. Hence, for example, we have OpenStack for creating instances, provisioning storage, network to do many things that are being done separately by VMWare, Citrix, Hyper-V. The intent is to have a common approach over several disparate approaches. In the networking world there is OpenFlow which tries to have a uniform interface to the many different standards maintained by the Ciscos, Junipers and Brocades of the world.  There are also other technologies like OpenCV (Computer Vision processing), Open VPN (VPN protocol) etc. In all these approaches there is either to move to unify or to provide a layer over and above the disparate approaches.  I am not sure whether Openstack will prevail, only time will tell. I personally think we will move to a level abstraction that will be even above that of Open Stack.
Software Defined Everything: Cloud Computing started with the need to be able to provision computing resources through a user interface or the Web portal. This was made possible, thanks to virtualization. Users could now define and request computing resources. Soon this led to the need for being able to programmatically request storage. The trick in storage is to do ‘thin-provisioning’ or to provision resources that barely satisfies the needs of the application. The application will be able to request more storage programmatically. Not to be outdone, networking followed suit when Software Defined Networking became a reality when Stanford and University of California came with the Open Flow protocol. We have now entered into the era of Software Defined Datacenter. This is a dominant theme in Cloud Computing.
These are some of the predominant trends that are emerging in the Cloud Computing arena.
I have spent more than 2 decades of my career in telecom, implementing telecom protocols, starting in the mid-1980s. The mid 1980s was the time when digital switches started to emerge. This was followed by a spate of protocols and dizzying innovations like mobile telephony, ISDN, Intelligent Networks, Softswitch, UMTS,3G, HSDPA, LTE etc.
I personally think that Cloud computing, to use a very frayed and hackneyed term, is at a similar ‘inflexion point’. Trends are emerging and we will soon be caught in the maelstrom of rapid change and innovation.
In this post I am going to do a Marty McFly of the ‘Back to Future’ trilogy. I am going to set the clock of the Delorean DMC-12 to 2020 and ‘Whoosh…..’
21 Apr 2020:
It is 21 Apr 2020 and a sunny day.  Here is a look at the Cloud Computing landscape
  • The Organization of Cloud Computing Standards (OCCS) now sets and governs the standards for all Cloud Providers of the world
  • Common APIs govern provisioning of instances on the cloud regardless of the Cloud Provider. Instances are defined by RPE values, RAM and IOPS, LB, DNS requirements
  • Networking bandwidth, security and storage are also standards based
  • Enterprises use a ‘diffuse deployment’ strategy where the organization’s workloads are deployed to multiple cloud providers.
  • Workloads are Cloud Provider agnostic.
  • Enterprise applications themselves may span multiple cloud providers for e.g. the e-commerce in Cloud Provider 1, Analytics on HPC instances on Cloud Provider 2 and secure applications on Private Cloud of Cloud Provider 3. Appropriate contracts are maintained between the Cloud Providers for charging for the usage.
  • Algorithms are used by enterprises to deploy workloads to cloud providers. The algorithms match the SLA and cost requirements of the application with those offered by the cloud provider to minimize the cost while meeting the SLA requirements of the applications.
  • Compute, storage and networking costs fluctuate and enterprises use algorithms to optimize the deployment of workloads. Workloads are migrated to take advantage of these price changes
  • Consolidation and acquisitions happen at an alarming pace. Cloud providers, storage, network and HPC providers aslo compete fiercely
  • Cloud providers are swallowed by others and some lose out. The battle scene is bloody
Time to get back to Delorean. This time the clock on Delorean is set to 2025
18 Sep 2025
Today it is 18 Sep 2025, and it is sunny again, coincidentally.
  • Cloud Computing is dead, mate. These days technology has moved to ‘Cloud Computing in a box’.
  • The technology of these times are ‘Haze works’ where the computation happens in the stratosphere over the ether …
So much for looking into the future. It is now time to get back to the reality of VMs
[polldaddy rating="7295683"]

Tuesday, October 21, 2014

Revisiting Whats up, Watson - Using Watson's Question and Answer with Bluemix - Part 2

In this I revisit the Bluemix app based on Watson's Question and Answer service which I had posted in my earlier article "Whats up Watson? Using IBM Watson with Bluemix, NodeExpress - Part 1". In this post I removed some redundant code and also added some additional checks to the Jade templates to handle responses to "focusless"  questions viz. Am I...? or "Is X contagious?"
You can run the app at Whatsup Watson?
The code can be forked and cloned from Devops at Whatsup
The code is also available at GitHub at Whatsup
The section below briefly describes the details of the implementation of the WhatsupWatson app
A) app.js
In the app.js module the VCAP environment is parsed to get the credentials to use the Watson Question and Answer service as shown below
if (process.env.VCAP_SERVICES) {
  var VCAP_SERVICES = JSON.parse(process.env.VCAP_SERVICES);
  // retrieve the credential information from VCAP_SERVICES for Watson QAAPI
  hostname   = VCAP_SERVICES["question_and_answer"][0].name;               
  passwd = VCAP_SERVICES["question_and_answer"][0].credentials.password; 
  username = VCAP_SERVICES["question_and_answer"][0].credentials.username; 
  watson_url = VCAP_SERVICES["question_and_answer"][0].credentials.url;
}
There different ways of asking Watson questions. Watson's response will vary depending on the options and parameters that are used to POST the question to Watson. This app uses a route for each 'question type' and option. These are
a. Simple Synchronous Query: Post a simple synchronous query to Watson
This is the simplest query that we can pose to Watson. Here we need to just include the text of the question and the also a Sync Timeout. The Sync Timeout denotes the time client will wait for responses from the Watson service
// Ask Watson a simple synchronous query
app.get('/question',question.list);
app.post('/simplesync',simplesync.list);
b. Evidence based question: Ask Watson to respond to evidence given to it
Ask Watson for responses based on evidence given like medical conditions etc.
// Ask Watson for responses based on evidence provided
app.get('/evidence',evidence.list);
app.post('/evidencereq',evidencereq.list);
c. Request for a specified set of answers to a question: Ask Watson to give a specified number of responses to a question
// Ask Watson to provide specified number of responses to a query
app.get('/items',items.list);
app.post('/itemsreq',itemsreq.list);
d. Get a formatted response to a question: Ask Watson to format the response to the question
// Get a formatted response from Watson for a query
app.get('/format',format.list);
app.post('/formatreq',formatreq.list);
To get started with Watson we would need to connect the Bluemix app to the Watson’s QAAPI as a service by parsing the environment variable. This is shown below
B) simplesync.js
 
The code in simplesync.js, evidencereq.js, itemsreq.js,formatreq.js are similar. The modules construct the question in the format required. The details of the implementation of simplesync.js is included below a. The Watson's corpus will be set to 'healthcare' 
parts = url.parse(watson_url +'/v1/question/healthcare');

b. The POST headers are set
// Set the required headers for posting the REST query to Watson
headers = {'Content-Type'  :'application/json',
                  'X-synctimeout' : syncTimeout,
                  'Authorization' : "Basic " + new Buffer(username+":"+passwd).toString("base64")};

c. The POST request options are set
// Create the request options to POST our question to Watson
var options = {host: parts.hostname,
port: 443,
path: parts.pathname,
method: 'POST',
headers: headers,
rejectUnauthorized: false, // ignore certificates
requestCert: true,
agent: false};
The question that is to be asked of Watson needs to be formatted appropriately based on the input received in the appropriate form (for e.g. simplesync.jade)
// Get the values from the form
var syncTimeout = req.body.timeout;
var query = req.body.query;
// create the Question text to ask Watson
var question = {question : {questionText :query }};
var evidence = {"evidenceRequest":{"items":1,"profile":"yes"}};
// Set the POST body and send to Watson
req.write(JSON.stringify(question));
req.write("\n\n");
req.end();
Now you POST the Question to Watson and receive the stream of response using Node.js’ .on(‘data’,) & .on(‘end’) shown below
var req = https.request(options, function(result) {
result.setEncoding('utf-8');
// Retrieve and return the result back to the client
result.on(“data”, function(chunk) {
output += chunk;
});

result.on('end', function(chunk) {    
           var answers = JSON.parse(output);
         results = answers[0];
         res.render(
      'answer', {
                      "results":results
                                        
      });
   
});
The results are parsed and formatted displayed using Jade. For the Jade templates I have used a combination of Jade and in-line HTML tags.
Included below is the part of the jade template with in-line HTML tagging
c) answer.jade
mplementation details of WhatsupWatsonapp
The section below briefly describes the details of the implementation of the WhatsupWatson app
A) app.js
In the app.js module the VCAP environment is parsed to get the credentials to use the Watson Question and Answer service as shown below
if (process.env.VCAP_SERVICES) {
  var VCAP_SERVICES = JSON.parse(process.env.VCAP_SERVICES);
  // retrieve the credential information from VCAP_SERVICES for Watson QAAPI
  hostname   = VCAP_SERVICES["question_and_answer"][0].name;               
  passwd = VCAP_SERVICES["question_and_answer"][0].credentials.password; 
  username = VCAP_SERVICES["question_and_answer"][0].credentials.username; 
  watson_url = VCAP_SERVICES["question_and_answer"][0].credentials.url;
}
There different ways of asking Watson questions. Watson's response will vary depending on the options and parameters that are used to POST the question to Watson. This app uses a route for each 'question type' and option. These are
a. Simple Synchronous Query: Post a simple synchronous query to Watson
This is the simplest query that we can pose to Watson. Here we need to just include the text of the question and the also a Sync Timeout. The Sync Timeout denotes the time client will wait for responses from the Watson service
// Ask Watson a simple synchronous query
app.get('/question',question.list);
app.post('/simplesync',simplesync.list);
b. Evidence based question: Ask Watson to respond to evidence given to it
Ask Watson for responses based on evidence given like medical conditions etc.
// Ask Watson for responses based on evidence provided
app.get('/evidence',evidence.list);
app.post('/evidencereq',evidencereq.list);
c. Request for a specified set of answers to a question: Ask Watson to give a specified number of responses to a question
// Ask Watson to provide specified number of responses to a query
app.get('/items',items.list);
app.post('/itemsreq',itemsreq.list);
d. Get a formatted response to a question: Ask Watson to format the response to the question
// Get a formatted response from Watson for a query
app.get('/format',format.list);
app.post('/formatreq',formatreq.list);
To get started with Watson we would need to connect the Bluemix app to the Watson’s QAAPI as a service by parsing the environment variable. This is shown below
B) simplesync.js
 
The code in simplesync.js, evidencereq.js, itemsreq.js,formatreq.js are similar. The modules construct the question in the format required. The details of the implementation of simplesync.js is included below a. The Watson's corpus will be set to 'healthcare' 
parts = url.parse(watson_url +'/v1/question/healthcare');

b. The POST headers are set
// Set the required headers for posting the REST query to Watson
headers = {'Content-Type'  :'application/json',
                  'X-synctimeout' : syncTimeout,
                  'Authorization' : "Basic " + new Buffer(username+":"+passwd).toString("base64")};

c. The POST request options are set
// Create the request options to POST our question to Watson
var options = {host: parts.hostname,
port: 443,
path: parts.pathname,
method: 'POST',
headers: headers,
rejectUnauthorized: false, // ignore certificates
requestCert: true,
agent: false};
The question that is to be asked of Watson needs to be formatted appropriately based on the input received in the appropriate form (for e.g. simplesync.jade)
// Get the values from the form
var syncTimeout = req.body.timeout;
var query = req.body.query;
// create the Question text to ask Watson
var question = {question : {questionText :query }};
var evidence = {"evidenceRequest":{"items":1,"profile":"yes"}};
// Set the POST body and send to Watson
req.write(JSON.stringify(question));
req.write("\n\n");
req.end();
Now you POST the Question to Watson and receive the stream of response using Node.js’ .on(‘data’,) & .on(‘end’) shown below
var req = https.request(options, function(result) {
result.setEncoding('utf-8');
// Retrieve and return the result back to the client
result.on(“data”, function(chunk) {
output += chunk;
});

result.on('end', function(chunk) {    
           var answers = JSON.parse(output);
         results = answers[0];
         res.render(
      'answer', {
                      "results":results
                                        
      });
   
});
The results are parsed and formatted displayed using Jade. For the Jade templates I have used a combination of Jade and in-line HTML tags.
Included below is the part of the jade template with in-line HTML tagging
c) answer.jade
if results.question.qclasslist
    for result in results.question.qclasslist
      p   Value   =  #{result.value}  
  if results.question.focuslist
    p   Focuslist   =  #{results.question.focuslist[0].value} 
  if latlist
    p   Latlist   =  #{results.question.latlist[0].value} 
Disclaimer: This article represents the author’s viewpoint only and doesn’t necessarily represent IBM’s positions, strategies or opinions
[polldaddy rating="7295683"]
Find me on Google+